We all love a warm shower, right?
Some water heater repairs are simple. However, if you aren’t comfortable with gas or electricity – call a professional.
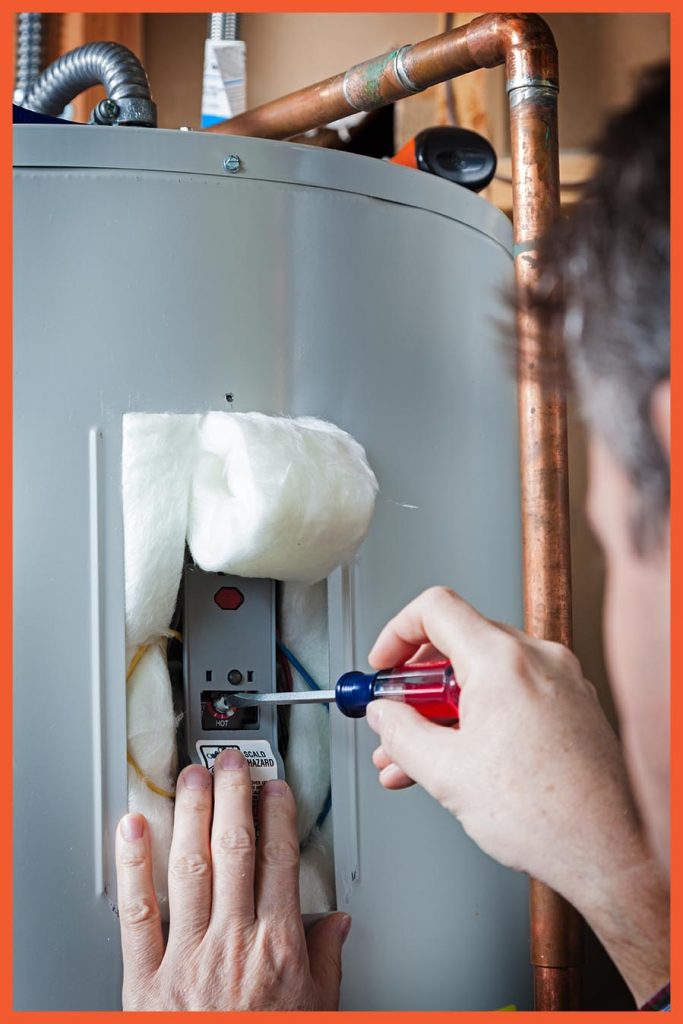
Regardless of the type of water heater, gas or electric, yours will have a safety device called a temperature and pressure relief valve, or T&P. Should your tank over-pressurize, the relief valve opens and releases the pressure. If the valve doesn’t open as designed the tank could then create too much pressure, resulting in an explosion.
Always wear safety gear and protective clothing when performing maintenance on your water heater.
Step 1
Turn off the electricity to the water or turn off the gas to extinguish the pilot light. Shut off the cold-water inlet to the water heater.
Step 2
Place a container, or bucket, to catch the water from the pressure valve. Pull the trip lever on the valve. There will be an distinct rush of air, possibly even visible little bit of vapor exit through the pressure relief valve. If that does not happen, drain the tank, and replace the valve.
Step 3
To replace the valve, remove the discharge pipe & unscrew the valve from the water heater. Notate the length of the stem and purchase an exact replacement. Place the new valve on the water heater by screwing it into place, using a wrench to tighten it. Re-attach the discharge pipe, turn on the water, and either turn the electricity on, or relight the pilot according to the manufacturer’s instruction.
Water Heater Tank Flushing
Sediment buildup in the tank will cause your water heaters efficiency, and also clog your water lines. By flushing the tank each time you check the pressure relief valve you can avoid these problems and increase the life of your tank.
Step 1
Turn off the electricity to the water heater, or turn off the gas to extinguish the pilot. Shut off the cold-water inlet to the water heater.
Step 2
Connect a garden hose to the tank’s drain valve. Place the end of the hose in a place they won’t be impacted by the scalding hot water.
Step 3
With the pressure relief valve open, you’ll need to open the drain valve and allow the tank to drain entirely. Making sure the tank is completely drained assures that all possible sediment has been cleared.
Step 4
Close the tank’s drain valve, remove the garden hose from the valve and close the pressure relief valve. Then turn on all hot water faucets in the house, and turn on the cold water intake to the tank.
Step 5
Turn of each running hot-water faucet as water begins to flow from it. Once all faucets are turned off, return electricity to the water heater, or turn the gas back on.
Gas Water Heaters: Lighting the Pilot
With the gas valve in an “on” position and the control knob set to “pilot”, press the knob and push the igniter button. The light will blink when it’s lit, and you will see a small flame in the view pane. Set the temperature to 120 degrees Fahrenheit.
Read the manufacturer’s lighting instructions for more detailed steps to lighting the pilot.
Electric Water Heaters:
Before Connecting Electricity
Step 1
If you turn your power on before the tank is completely full your upper heating element will burn out and you will be without hot water until the burned out element is replaced.
Step 2
To replace the top or bottom heating element, disconnect the power to your water heater and drain the tank. Disconnect the wires from the heating element and loosen it using an element wrench. Remove the element and pull it straight out. Replace the old element with the new one and tighten using the element wrench. Reconnect the wiring and prepare to refill the tank.
Step 3
Turn a hot water faucet on all the way for 3 minutes. Doing this ensures all of the air has been removed and the tank is completely full of water. Once the tank is full, turn the power on. If, after two hours, you still don’t have hot water, check the unit to make sure it is receiving the proper voltage. The label on the water heater will have the power requirements. Often times no electric power, or an incorrect voltage causes many electric water heaters problems. An electrician may be needed to solve wiring/power problems.
Water Heater Leaks & Drips
Step 1
Often times leaks are caused by faulty water supply connectors. Check your work carefully, use proper techniques, and quality materials. Because copper pipes need to be soldered, compression fittings are better suited for DIY’ers.
Step 2
A thermal expansion tank is usually needed if you have dripping from your temperature and relief pressure valve discharge pipe.